Are you a weight lifter looking to target and strengthen your back? Look no further!
We’ve got the tips and tricks you need to transform your workout into an overall back-building experience.
With these compound exercises, you can create a routine that will truly maximize results by targeting multiple muscles at once.
So without further ado, let’s jump in and learn how we can use targeted exercises to build up our back muscles!
What Are Compound Back Exercises?
Compound back exercises are multi-joint movements that engage multiple muscle groups simultaneously to strengthen and stabilize the upper and lower back regions.
These exercises not only improve overall back strength and posture but also promote better functional fitness, athletic performance, and injury prevention.
By targeting a wide range of muscles at once, compound back exercises save time and maximize training efficiency.
One of the primary reasons why compound back exercises are highly effective is that they closely mimic the everyday movements and actions our bodies perform.
For instance, picking up heavy items, pulling, or pushing requires various muscle groups to work together to execute the movements.
By incorporating compound back exercises into your workout routine, you are better prepared for these real-world functional demands.
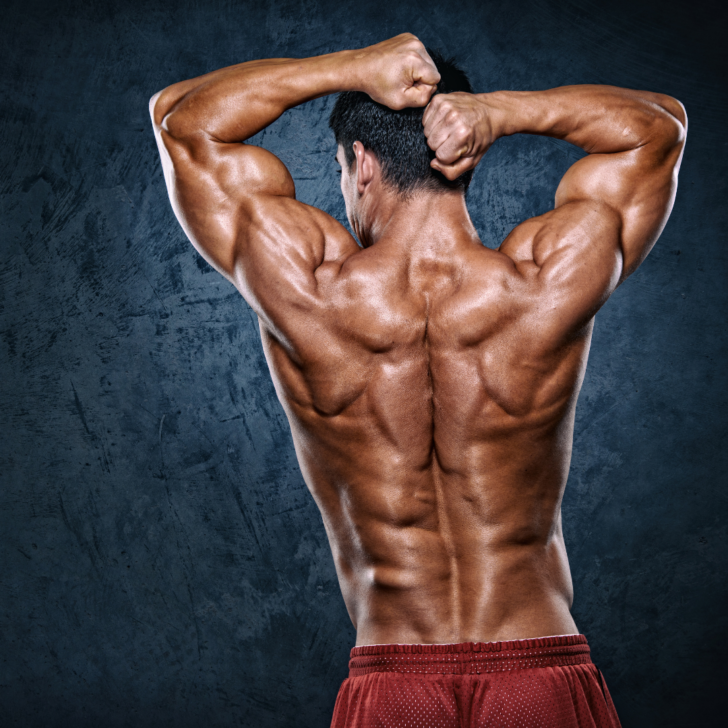
Back Muscle Anatomy
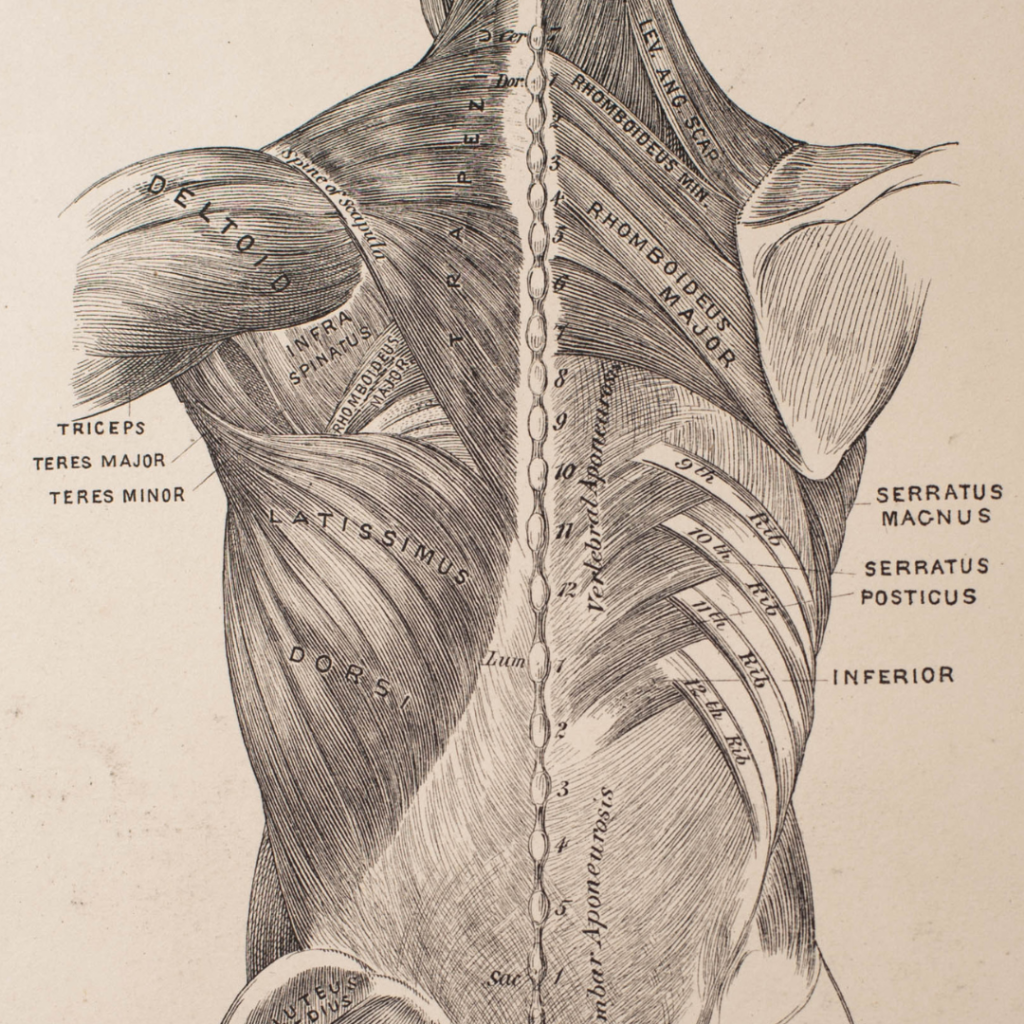
The human back is composed of complicated anatomy involving many different muscles and structures.
The posterior musculature consists of the latissimus dorsi, trapezius, rhomboids, erector spinae, teres major and minor, infraspinatus, supraspinatus, levator scapulae, serratus anterior and posterior, and pectoralis major.
The latissimus dorsi helps to extend the shoulder joint as well as adduct it; it also assists in internal rotation of the upper arm.
It is a large and flat muscle that originates from several lower spine vertebrae and ribs before inserting into the humerus bone at the shoulder joint.
The trapezius runs from the occipital area of the neck down to the middle of the thoracic spine.
This muscle helps to retract or stabilize the scapula during activities such as pressing movements or throwing actions.
It also aids in extending or lifting the head against gravity when looking upwards.
The rhomboids are a pair of muscles located between the scapula and vertebral column which help support posture by assisting with retraction of both sides of the scapula towards one another.
The erector spinae are three sets of long muscles located along either side of your spine which help flex or extend your back in addition to helping with rotational movements.
The teres major and minor muscles run from outside edges of your scapula all way down to your humerus bones near your elbows.
These muscles aid in extension (lifting upward) as well as adduction (bringing toward midline) of your arms.
They also help internally rotate your humerus when needed for certain exercises such as rows or pull-ups.
Infraspinatus, supraspinatus, levator scapulae, serratus anterior and posterior, are all associated with movement at both shoulder joints to facilitate powering rotational motions up into higher levels like arms swinging overhead in a reaching motion or downward like in a throwing action.
Lastly but certainly not least is pectoralis major which forms part of chest wall but its fibers attach onto humerus bone making it an important part when considering shoulder joint movements such as reaching out away from body during arm swing for push up or handing something off.
What Muscles Are Engaged In Compound Back Exercises?

In compound back exercises, several muscle groups are actively engaged to build strength, improve posture, and enhance overall physical performance.
These exercises target key muscles in the upper and lower back, as well as neighboring muscle groups that synergistically work together for more efficient movement.
Some of the main muscles engaged include:
- Latissimus dorsi (lats) – The largest muscle group in the upper back, which stretches from the lower spine to the sides of the ribcage.
- Trapezius (traps) – This muscle group is located between the neck and shoulder blades and extends down the middle of the back.
- Rhomboids – Located between the shoulder blades, the rhomboids work together with the trapezius muscles to stabilize and retract the shoulder blades.
- Erector spinae – This group of muscles runs along the length of the spine and provides essential support to the spinal column.
- Teres major and minor – These muscles are found on the outer edge of the shoulder blade and are involved in shoulder joint movements.
- Posterior deltoids – Located at the back of the shoulders, these muscles work together with the lats and teres major in shoulder extension movements.
- Biceps brachii – Although predominantly an arm muscle, the biceps brachii plays a secondary role in compound back exercises by assisting with shoulder flexion and elbow supination.
- Forearm and hand muscles – These muscles are activated when gripping weights or equipment during compound back exercises.
Back Exercise Tips
1. Start with a warm-up: Make sure to perform 5-10 minutes of light aerobic exercise (e.g., walking, jogging, or cycling) before doing any back exercises.
This helps to increase blood flow and body temperature, allowing for more effective and safe training.
2. Choose the right exercises: When deciding on back exercises, focus on compound movements that involve multiple muscle groups, such as pull-ups, bent over rows and lat pulldowns that target the lats and trapezius muscles simultaneously.
3. Use good form: When performing back exercises, proper form is essential for achieving maximum results without increasing risk of injury.
It is important to keep your spine in a neutral position throughout the movement, maintain an even tension in both arms/legs and use a full range of motion from start to finish while avoiding jerky or explosive movements that can cause strain on the muscles or joints.
4. Increase the weight gradually: When increasing resistance during back exercises, make sure to do so gradually in order to prevent injury and get used to heavier loads safely.
Additionally, increase each set sequentially rather than jumping straight into a heavy weight.
This allows your body time to adjust and prepares your muscles for tougher challenges ahead.
5. Don’t neglect core stability: It is important to pay attention to core stability while performing back exercises.
Strong abdominals are necessary for balance and help protect your spine from excessive loading or torque during movement patterns such as deadlift variations or winrows.
6. Rest between sets: Take at least 1 minute rest between sets when doing compound back exercises.
This ensures muscles have recovered enough energy for the next set and prevents fatigue which can potentially lead to poor form or injuries during lifting heavier weights later in the session
The Best Compound Back Exercises
Deadlift
Deadlifting is an incredibly effective compound exercise for strengthening and building your back muscles.
It works the erector spinae, which are a group of muscles that run along the spine and help to support it.
This exercise also targets your glutes, hamstrings, and quads, making it a great full-body workout.
Benefits
–Strengthens the core and improves posture.
–Enhances grip strength.
–Improves functional strength.
–Increases testosterone levels.
Tips
–Keep your back straight while performing the exercise.
–Maintain a neutral neck position throughout.
–Keep your shoulder blades retracted when lifting.
–Keep your shoulder blades retracted when lowering.
–Always use proper form.
Step-By-Step Guide
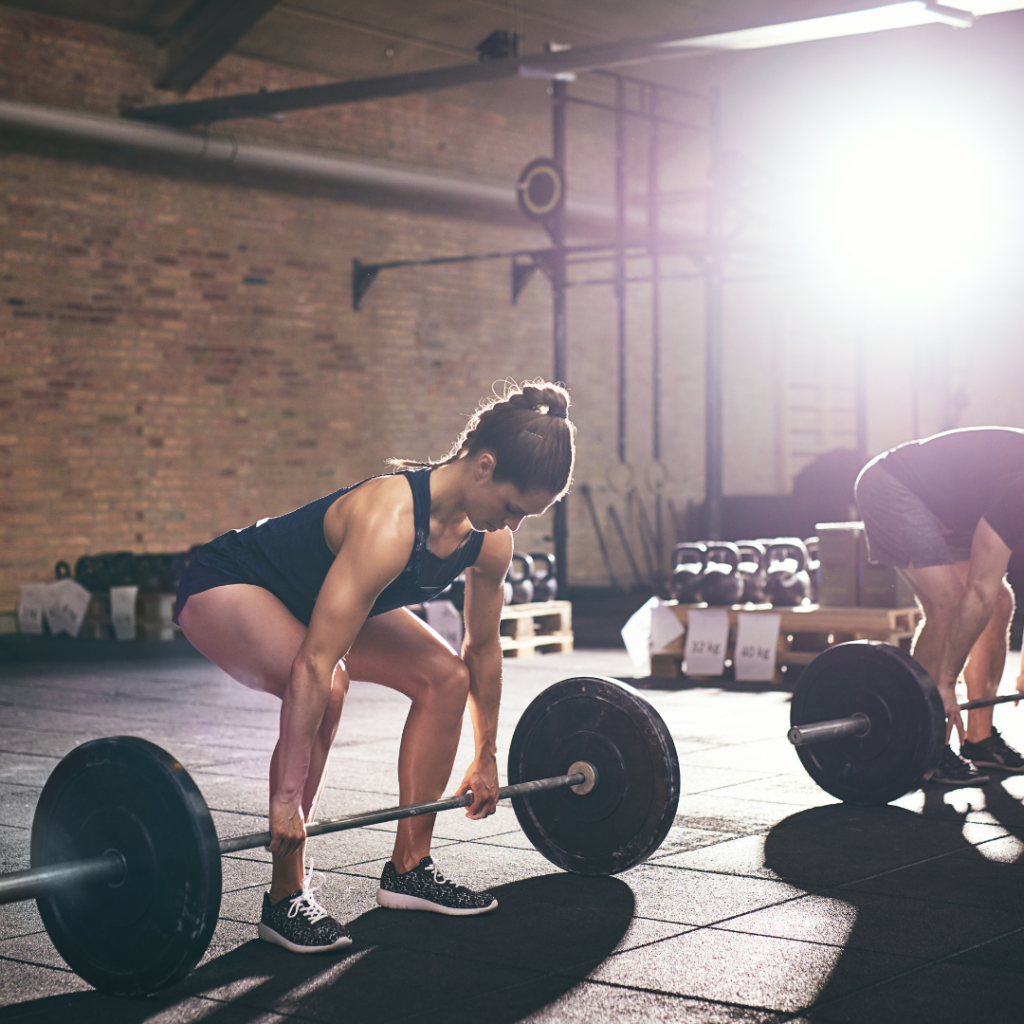
1. Start by standing in an upright position with your feet shoulder-width apart, gripping the barbell at hip-level with both hands.
Make sure your palms are facing downward and the bar is close to your shins.
2. Bend your knees slightly, keeping them in line with your toes.
Your back should be neutral throughout this entire exercise, meaning it should remain straight, not curved or arched.
It should be parallel to the ground if viewed from the side.
3. With your back straight, press through the heels of your feet to lift the bar up off the ground until it reaches just above knee height.
Keep the bar as close to your body as possible during this movement so as not to strain yourself by having it move away from you too much while lifting it up into position.
4. Once the bar has been raised up off the ground and is hovering just above knee level, drive through your heels and use your glutes to stand fully upright with arms extended downwards toward the floor in front of you.
This is considered one full repetition of a deadlift.
Make sure not to lock out fully at any point during this motion and keep good form maintained throughout each set of repetitions as best you can!
5. For optimal results, ensure that you keep tension on all major muscle groups throughout each repetition and don’t allow any slackening or momentum throughout this exercise
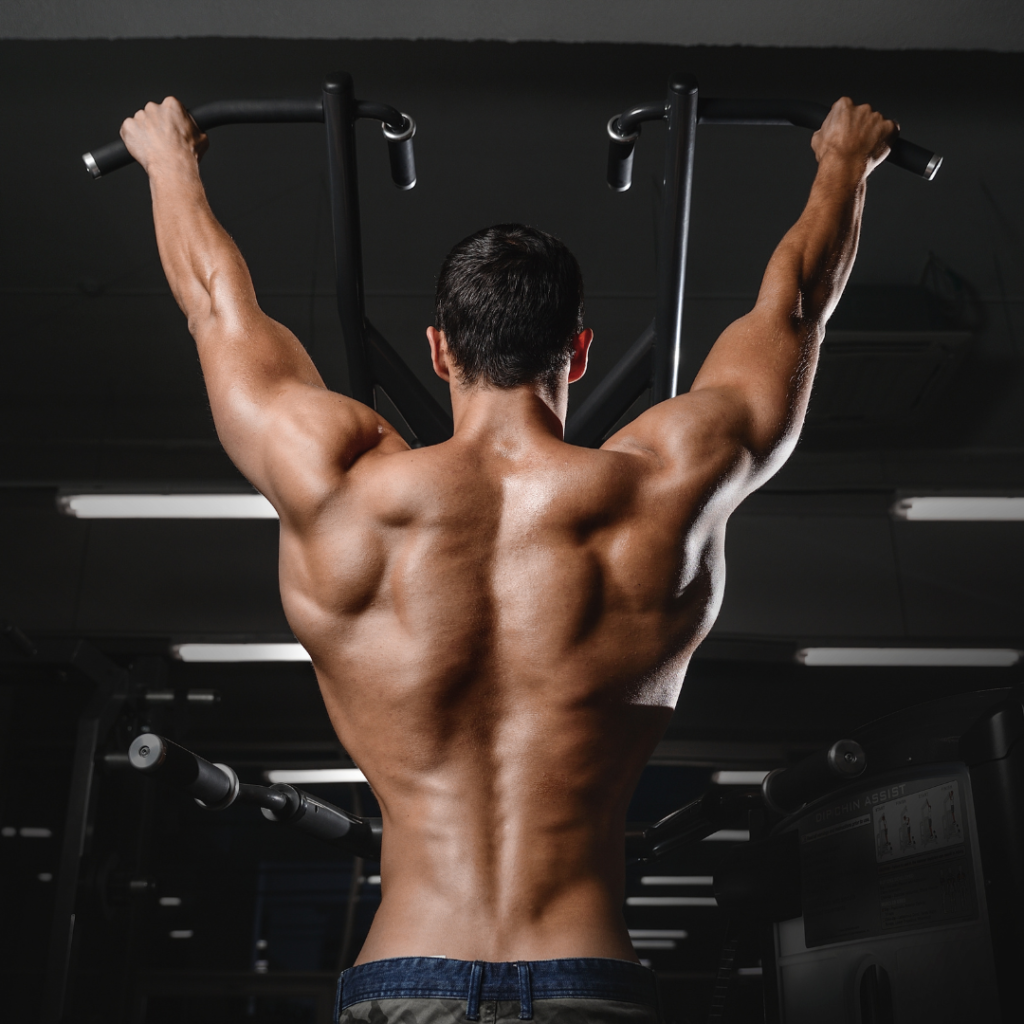
Pull-Ups
This classic back exercise is great for targeting your lats (the muscle in the middle of your back) as well as other muscles in the upper body like your biceps and shoulders.
Benefits
–Increases upper body strength
–Strengthens the core.
–Increases grip strength.
–Increases coordination and stability.
Tips
–Focus on using correct form throughout this exercise to maximize results.
–Keep a wide grip.
–Tuck in elbows close to sides.
–Retract shoulder blades before beginning motion.
–Always use full range of motion to ensure complete engagement of targeted muscle groups.
Step-By-Step Guide
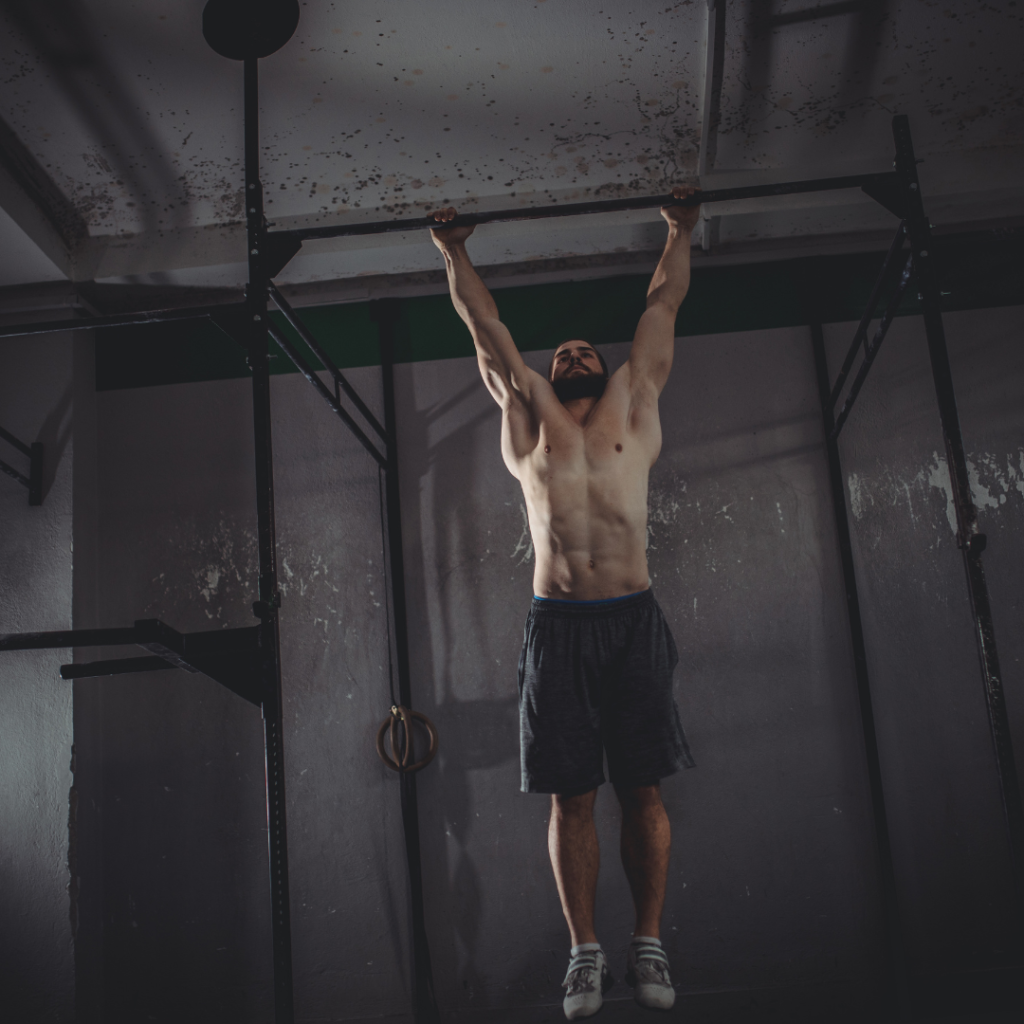
1. Begin by finding an appropriate pull-up bar that is securely fastened and can hold your weight.
It should be at least 12 inches above your reach when standing on your toes so you can hang from the bar with a full grip.
2. Make sure your hands are in a wide overhand grip, with palms facing away from you.
You should have around 10-12 inches between each hand and a firm grip on the bar to ensure stability and reduce risk of injury.
3. With your arms fully extended and body straight, start to pull yourself up towards the bar until your chin is above it.
As you do this, focus on engaging your back muscles and keeping the abdominal muscles tight for support throughout the movement.
Beginners may choose to use an exercise band or partner assistance as needed for support during this step.
4. After reaching the top position, slowly lower yourself back down until arms are fully extended once again.
Repeat this process for desired number of repetitions (generally 3 sets of 8-12 repetitions).
Bent-Over Rows
This technique targets many of the same muscles as pull-ups but with less stress on the joints due to its bent-over stance.
Benefits
–Strengthens upper back muscles such as rhomboids and trapezius as well as lower back muscles like erector spinae.
–Improves posture by strengthening lats.
–Increases balance by training stabilizer muscles between vertebrae in spine.
Tips
–Keep head level with torso during movement – do not lift or drop head during exercise.
–Avoid arching the lower back while performing bent over rows.
–Focus on maintaining a flat back position throughout movement for best results.
Step-By-Step Guide
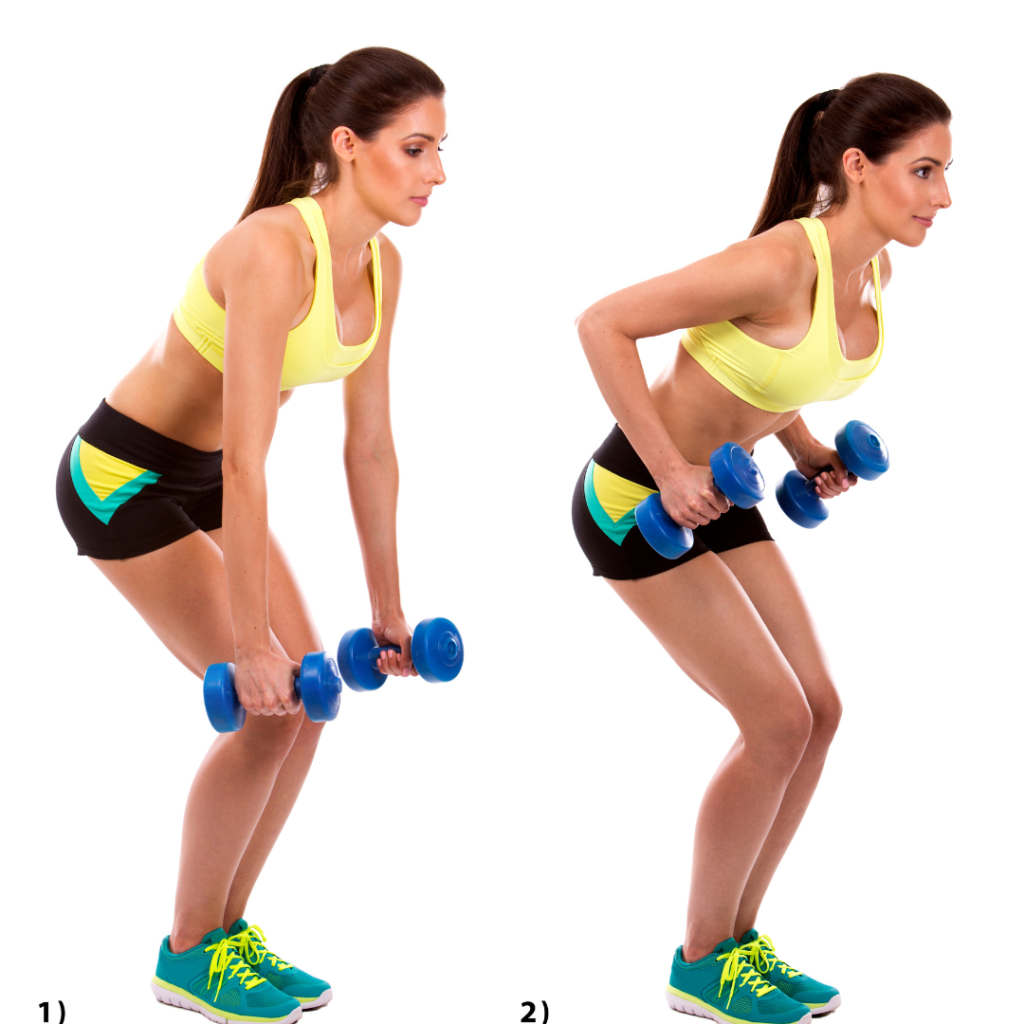
1. Stand with feet hip-width apart, toes pointing slightly outward.
Bend your knees and hinge forward from the hips so that your back is flat and a slight bend in the knee remains.
2. Hold a dumbbell in each hand directly beneath your shoulders, palms facing in toward each other.
3. Maintain a neutral spine throughout the exercise by keeping your core tight and ribs tucked toward the pelvis.
This will help keep the lumbar spine safe from injury.
4. Initiate movement of the bent over row by squeezing the shoulder blades together while lifting both dumbbells up towards your chest, maintaining a firm grip on each one as you do this.
5. Extend both arms back down to the starting position at a slow and controlled pace, making sure to keep the core engaged and shoulders stable throughout the set range of motion of this exercise for maximal benefit and safety.
6. Once you’ve completed all desired repetitions, put down both dumbbells slowly to avoid lower back injury or trauma from sudden movements after heavy weight lifting sets.
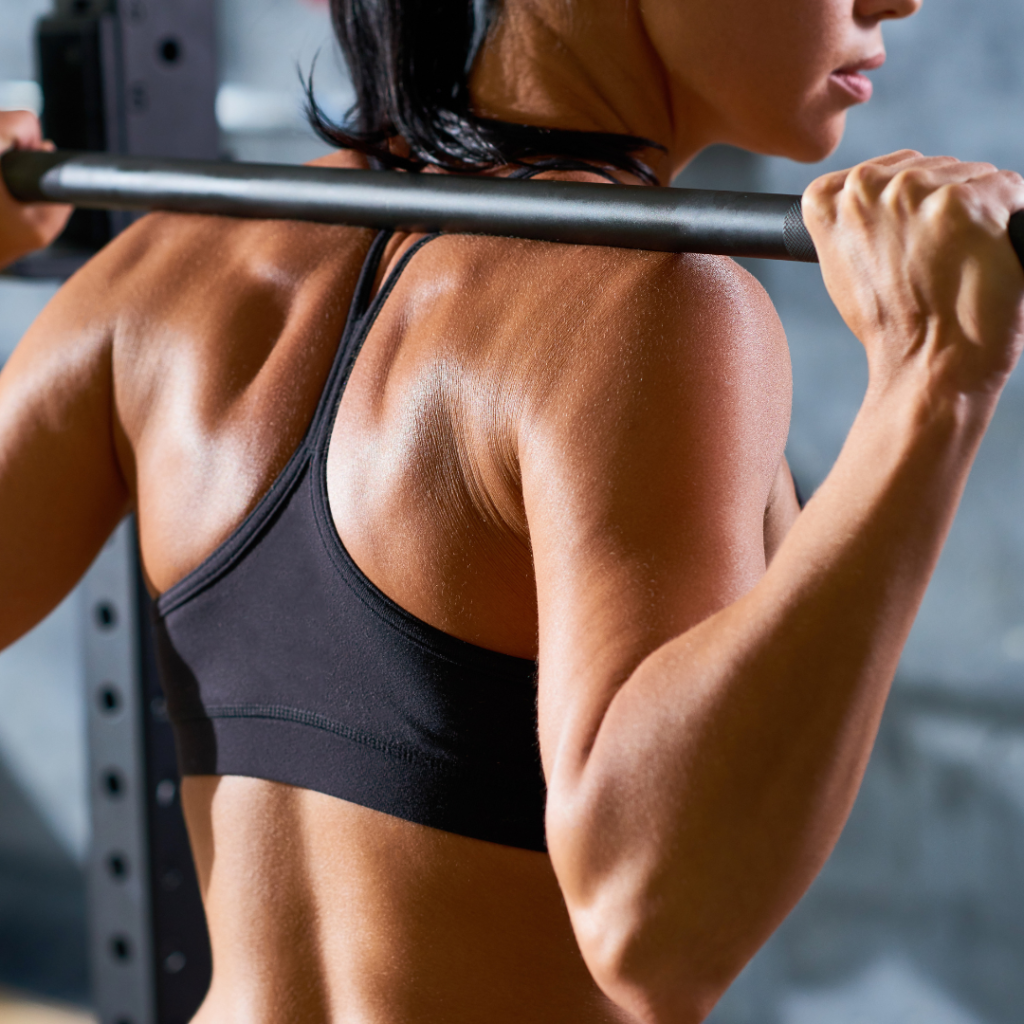
Lat Pulldown
An excellent exercise for isolating the lats (muscles across top of back).
Benefits
–Strengthen latissimus dorsi primary movers of arm adduction/pulling action).
–Increases grip strength with use of pronated or supinated grips throughout movement.
–Enhances mid-back stability due to increased emphasis on scapular retraction throughout movement pattern.
Tips
–Sit upright without slouching during entire exercise.
–Do not lean forward during entire range of motion.
–Keep elbows tucked closely towards sides at all times.
–Focus on squeezing shoulder blades together at end of each repetition for best results.
Step-By-Step Guide
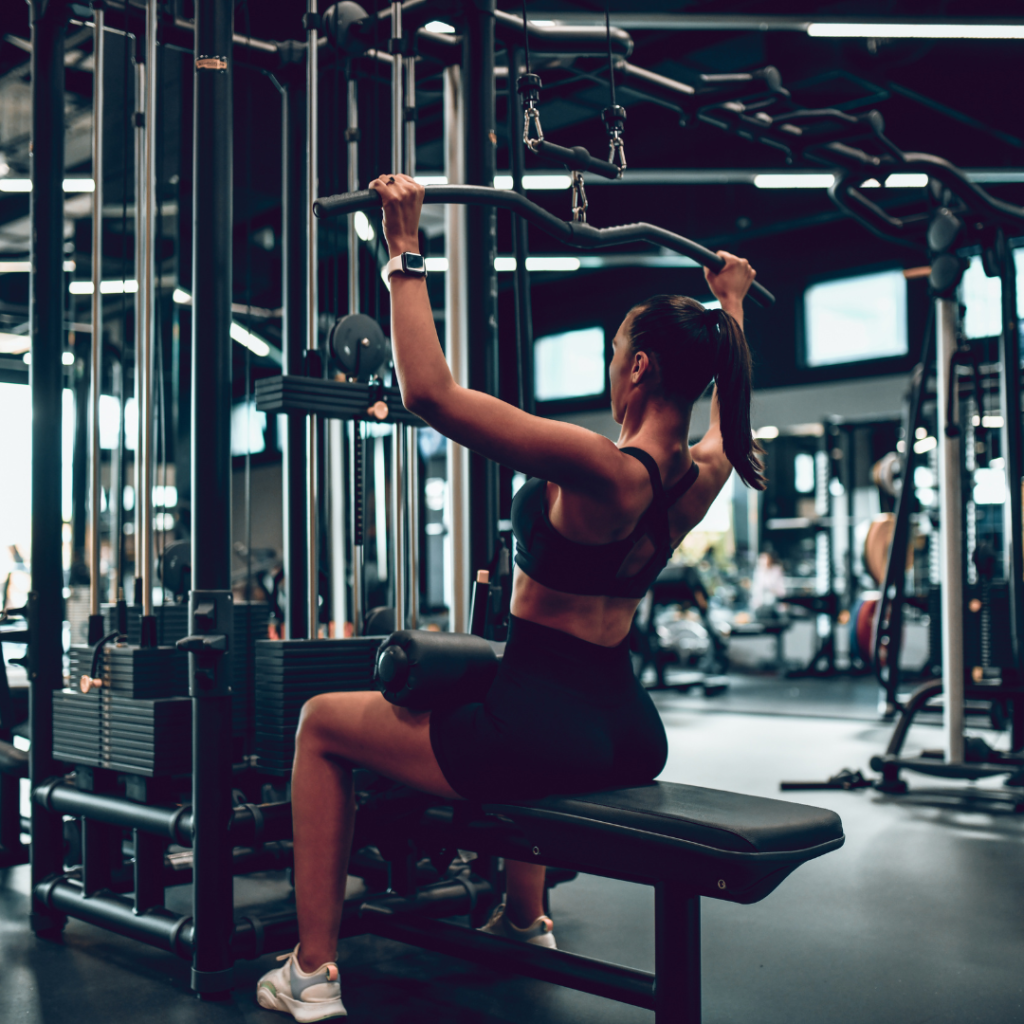
1. Sit comfortably on the bench provided, with your feet firmly planted on the ground and your knees positioned under the kneepads of the machine (if available).
2. Begin by grasping the bar or attachment with a grip slightly wider than shoulder-width, palms facing forward.
Retract your shoulder blades and elongate your spine, keeping your chest puffed out and your shoulders down for proper alignment.
3. Take a deep breath and initiate the movement by engaging your lats, pulling the bar down towards your chest.
Throughout this phase, keep your elbows close to your body and focus on squeezing your shoulder blades together as they lower.
Your chest should rise to meet the bar while your head and neck remain in a neutral position.
Once the bar reaches your upper chest, pause for a moment to ensure optimal muscle contraction.
4. Slowly release the weight by extending your arms back to the starting position while maintaining proper posture and spinal alignment.
Your shoulder blades should return to their neutral position, and your lats should experience a gentle stretch at the top of the movement.
This stretch is essential because it allows the muscles to engage fully during the next repetition.
5. Continue performing the exercise for the desired number of repetitions, maintaining proper form to ensure muscle engagement and prevent injury.
Aim to complete 3-4 sets of 8-12 repetitions, depending on your fitness level and goals.
Regularly incorporate lat pulldowns into your upper body workouts to build strength and improve overall back and shoulder stability.
Band Pull Aparts
A fantastic exercise for focusing primarily on rhomboids & external rotators located in rear deltoid region.
Can be done without any equipment just using resistance bands.
Benefits
–Develops shoulder health through targeting shoulder extensors/rotators.
–Helps improve posture.
–Strengthens rhomboid & trapezius areas.
–Promotes scapular mobility/stability.
Tips
–Start with light band weight before progressing to heavier resistances.
–Keep arms slightly bent near elbow level while widening hands away from one another throughout repetition.
–Focus on keeping torso upright & stationary while executing pull aparts.
Step-By-Step Guide
1. Hold the resistance band with both hands, palms facing down, and grip the band at a width slightly wider than shoulder-width apart.
The band should feel taut, but not stretched, at the beginning of the movement.
2. With your arms extended straight out in front of you, the band should be at chest height and parallel to the floor.
Keep your wrists straight and maintain constant tension on the band.
Retract your shoulder blades to ensure your chest is up and shoulders are down, preventing any strain or injury during the exercise.
3. Begin the movement by slowly pulling the band apart, extending your arms out to the sides.
Keep your elbows straight, but not locked, and avoid lifting your shoulders or bending your wrists.
Maintain control of the movement as you engage your upper back and shoulder muscles.
4. Continue pulling the band apart until your arms are in line with your shoulders and the band touches your chest.
Hold this position for a moment, squeezing your shoulder blades together to maximize muscle engagement.
5. Slowly bring your hands back together while maintaining tension on the band.
Focus on control and resisting the band’s pull as you return to the starting position.
This eccentric portion of the movement is vital for building strength and improving muscle control.
6. Aim for 12-15 repetitions per set and perform 2-3 sets during your workout.
As your strength improves, you can increase the resistance level by choosing a thicker band or by gripping the band closer together.
Single Arm Dumbbell Row
A great compound movement that strengthens various sections within entire posterior chain including spinal erectors, lats, mid-back, rear deltoids, traps, glutes & hamstrings.
Benefits
–Develops posterior chain muscularity quicker than traditional rowing exercises.
–Increases core stabilization due to single arm nature requiring greater demand from obliques/abdominals.
–Improves joint health surrounding rotator cuff area.
Tips
–Be sure to maintain correct form (plank position) during single-arm row.
–Avoid rotating torso during entirety of row. Stay tall by keeping barbell close against ground without allowing it drift away from body.
–Keep pulling arm steady towards chest avoiding uncontrolled hip swaying movements.
Step-By-Step Guide
1. Find a flat, sturdy bench and place it in an area where you have enough space to move freely.
Stand next to the bench on your left side, with your feet hip-width apart and your knees slightly bent.
Place the dumbbell on the ground on the same side, close to the bench.
2. Place your right hand and right knee on the bench so that your upper body is parallel to the floor, creating a stable, supportive base.
Pick the dumbbell up with your left hand, maintaining your grip with your palm facing your body.
Straighten your left arm, letting the dumbbell hang down from your shoulder, while keeping your back straight and core engaged.
3. Slowly lift the dumbbell towards your torso, bending your elbow and retracting your shoulder blade.
Focus on squeezing your back muscles while raising the dumbbell, ensuring that you maintain the alignment of your body, and avoid twisting or turning your torso.
Hold the contraction at the top of the movement for a second, then slowly lower the dumbbell back to the starting position.
Make sure to control the weight throughout the entire exercise.
Repeat the rowing motion for a set number of repetitions before switching sides and performing the same steps with the opposite hand and leg.
4. To increase the effectiveness of this exercise, be sure to use proper form and technique and progressively increase the weight of the dumbbell as you grow stronger.
Remember to maintain a stable base and avoid jerking the weight to prevent injury.
For further progression, consider varying your grip (supinated, pronated, or neutral) to target different muscle groups and incorporate additional exercises that target the same muscle group.
Medicine Ball Slams
An explosive yet safe way to increase power output throughout posterior chain musculature.
Benefits
–Enhances core control leading into overhead movements.
–Improves speed due to fast twitch muscle recruitment needed when slamming medicine ball onto ground below feet.
Tips
–Perform slam with flat palms aiming medicine ball downwards towards ground.
–Ensure feet remain grounded during entire.
Step-By-Step Guide

1. Stand with your feet hip-width apart, grasping the medicine ball with both hands.
Keep your arms extended in front of you and your back straight.
2. Using the force from your legs, explosively lift the medicine ball up in an overhead motion while slightly bending backwards while engaging your core muscles.
3. Drive the medicine ball down towards the floor as fast as possible, using your glutes and core to maintain balance and stability.
4. When the ball hits the ground, immediately tighten your core and legs to absorb impact of the slam and then drive back up for another repetition.
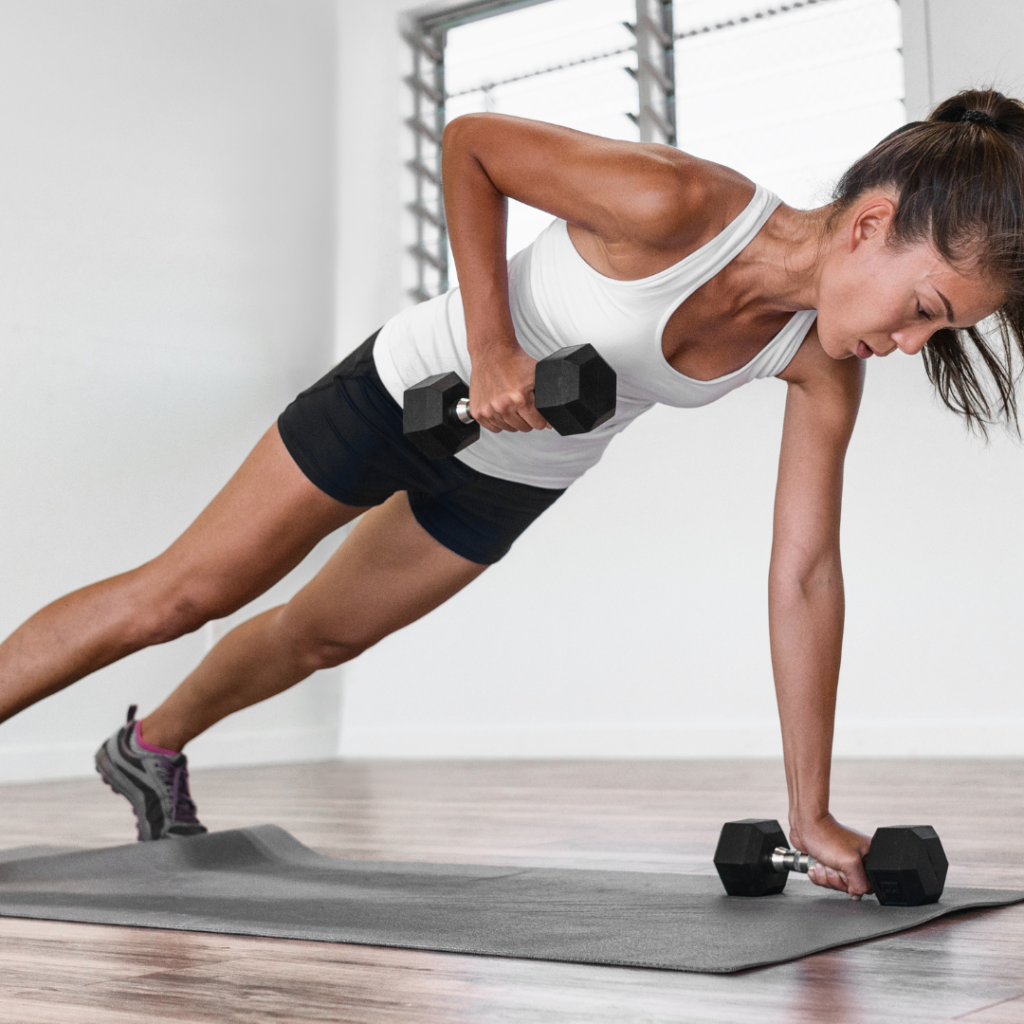
Renegade Rows
A great addition when seeking to develop core stability alongside upper body strength due to its unilateral nature requiring engagement from both sides of our bodies alongside core activation in order to maintain balance between both arms during said activity.
Benefits
–Promotes core stability through resisting rotational torque developed when performing row.
–Strengthens mid-back (Rhomboids) & upper back (Traps/Lats).
Tips
–Start with light weight until form is perfected.
–Keep torso stable throughout entire motion.
–Focus on squeezing shoulder blades together during row phase of movement to best engage targeted muscles.
Step-By-Step Guide
1. Start by getting into a high plank position, with your hands on the dumbbells or kettlebells, placed shoulder-width apart, directly below your shoulders.
Keep your feet hip-width apart or wider for better stability. Engage your core, glutes, and quads to maintain a straight line from your head to your heels throughout the exercise.
2. While maintaining the push-up position, slowly shift your weight onto your left hand as you lift the right dumbbell or kettlebell towards your chest.
Keep your elbow close to your body as you perform the row. Hold this position for a second at the top, focusing on engaging your back muscles.
Slowly lower the weight back to the ground and return to the initial push-up position.
3. Now, keeping the push-up position, shift your weight onto the right hand and perform the same rowing movement with the left dumbbell or kettlebell.
Keep your core engaged to avoid any rotation or sagging in your hips.
4. For an advanced variation, after performing a row on both sides, you can perform a push-up by lowering your chest to the ground while maintaining the plank position, and then pushing yourself back up to the initial position with your arms fully extended.
5. Continue alternating between the rowing movement on each arm, maintaining the push-up position, and engaging your core muscles.
Perform the desired number of repetitions or until you reach muscular fatigue.
Remember to breathe throughout the exercise, inhaling as you lower the weight and exhaling as you perform the row.
Face Pulls
A fantastic dynamic postural pulling exercise that works wonders especially when it comes improving posture not only by correcting rounded shoulders but also by engaging said muscles surrounding neck region offering best support which helps build overall resilience against potential injuries overtime if done regularly!
Benefits
–Incorporating face pulls into your workout regimen can help counteract the effects of poor posture.
–Face pulls are a valuable exercise for maintaining overall shoulder health and resilience.
–Face pulls work several muscle groups, including the rear delts, traps, and rhomboids.
–Enhances the strength and activation of the scapular muscles.
Tips
–When performing face pulls, it is important to ensure that your body is in the correct posture and alignment.
–It’s important to keep a tight grip on the handle while performing face pulls, but also to make sure that you don’t jerk or swing it too quickly as this could cause damage to muscles or ligaments.
–To work out all of your back muscles effectively, use a full range of motion when performing face pulls.
–As you become more experienced and stronger with this exercise, increase resistance by adding weight or using higher tension bands in order to continue challenging yourself.
–Although it can be tempting to speed through reps, it’s important to focus on good form and technique when doing face pulls.
Step-By-Step Guide
1. To perform face pulls, you’ll need access to a cable machine with a rope attachment.
Alternatively, you can also use a resistance band. Ensure the chosen equipment provides adjustable resistance levels to suit your fitness needs and prevent injuries while performing the exercise.
2. Stand facing the cable machine or the resistance band anchor point with a generous step back (to ensure sufficient resistance).
3. Set the cable machine to a high position or secure the resistance band at chest height, giving ample opportunity to hit the target muscles.
Attach the rope handle to the cable machine or grab both ends of the resistance band, ensuring an even distribution of resistance.
4. Grasp the rope attachment or resistance band with an overhand grip (palms facing towards you), at the sides of your head, with your elbows bent outwards.
Your hands should be slightly wider than shoulder-width apart, and your wrists neutral (not bent).
5. Slowly pull the rope or resistance band towards your face, leading with your elbows and keeping them up and wide at all times.
Focus on contracting and squeezing your upper back and rear deltoid muscles as you draw the rope or band towards your ears.
Your hands should end up at either side of your face, with your palms facing each other and your elbows pointing outwards.
6. Keep your chest up, shoulders down and back, and core engaged throughout the entire motion.
Avoid using momentum, and concentrate on using the target muscles to perform the pull.
Your head should remain stationary, with your eyes facing forward.
7. Slowly bring the rope or resistance band back to the starting position while maintaining tension in your upper back and rear deltoid muscles.
Do not allow the cable or band to snap back but maintain control, emphasizing the eccentric phase (the lowering or lengthening part) of the movement.
8. Aim for 3-4 sets of 12-15 repetitions, focusing on proper form, and gradually increasing the weight or resistance as you become more comfortable with the movement.
Kettlebell Swings
An effective full body exercise that increases cardiovascular endurance, strengthens muscles around glutes and hamstrings, core stability & shoulder strength.
Benefits
-Increases heart rate for fat loss benefits.
-Strengthens muscles around glutes and hamstrings.
-Improves core strength & stability.
-Enhances shoulder girdle strength.
Tips
–Perform swings with a flat back and strong core through entire movement.
–Avoid over extending and hyperextending lower back, rather move from the hips through each swing.
–Keep shoulders relaxed as best possible.
–Keep arms long with a light grip on kettlebell handle throughout.
–Ensure feet stay grounded in same spot and avoid shifting/repositioning when swinging.
–Start with light weights and increase weight overtime as you get more comfortable with the movement.
Step-By-Step Guide
1. Begin by standing with your feet shoulder-width apart, with a kettlebell centered between your feet.
Grasp the handle of the kettlebell firmly with both hands and slightly bend your knees to hinge at the hips.
2. Keep your back flat and core engaged as you push your glutes backwards, swinging the kettlebell between your legs in a smooth motion.
3. Once the kettlebell reaches its furthest point behind you, drive through your heels to stand up tall and thrust your hips forward while simultaneously swinging the kettlebell out in front of you until it reaches chest level.
4. As the momentum of the kettlebell carries it back down towards its furthest point behind you, repeat this process for consecutive repetitions keeping in mind that form should always be prioritized over speed or weight lifted.
Seated Cable Rows
Another popular compound movement best used by intermediate trainers seeking furthering their upper body development potential.
Benefits
-Improves posture and strengthens muscles surrounding spine.
-Enhances stability of shoulders by strengthening rotator cuff muscles.
-Improves mid-back muscles development.
Tips
–Perform cable rows with a flat back and strong core throughout the movement.
–Avoid arching the lower back, rather move from the hips through each row.
–Keep arms long with a light grip on cable handle throughout.
–Ensure feet stay grounded in same spot and avoid shifting/repositioning when doing.
Step-By-Step Guide
1. Lean forward slightly, keeping your back straight, and grasp the close-grip handle with an overhand grip (palms facing each other).
Use your legs to push back slightly until your arms are fully extended, which will ensure you are seated in the correct starting position.
2. Before initiating the row, brace your core and focus on keeping your spine in a neutral position throughout the movement.
Maintain a slight arch in the lower back while pulling the cable toward you.
3. Slowly pull the cable handle towards your abdomen, focusing on driving your elbows back and squeezing your shoulder blades together.
Be mindful of keeping your shoulders down and away from your ears as you pull.
When the handle reaches your abdomen, pause briefly to fully contract your back muscles.
4. Slowly extend your arms back to the starting position, maintaining control of the cable and resisting the urge to let it snap back quickly.
Allow the weight stack to lightly touch before initiating the next row.
5. Aim for three to four sets of 8-12 repetitions, depending on your fitness level and goals.
Focus on maintaining proper form and using a comfortably challenging resistance level throughout each set.
Mistakes To Avoid
- Hyperextending the lower back when bending forward.
- Elbows flaring out instead of pulling back.
- Using a weight which is too heavy and compromises form to reach desired repetitions.
- Lowering arms too quickly.
- Allowing for momentum rather than muscle contraction.
Conclusion
To summarize, the best compound back exercises will help to target all your back muscles and give you maximum results.
Now that you understand the basics of back muscle anatomy, as well as which compound exercises are best for working your back muscles, it’s time to start building strength and sculpting the back of your dreams!